If your organization has multiple locations or campuses, and they all share the same bank account, you can add them as a campus so that you can manage them all from a single Givelify account. Each of the campuses will appear as a separate profile on the app so donors can easily find and donate to them.
You can also assign a Faith leader, set up the campus profile, invite users, and create envelopes/campaigns after the campus has been approved.
Adding Campuses
Users with Admin permissions can add campuses for their organization. Follow these steps:
- Visit analytics.givelify.com and log in to your organization’s account.
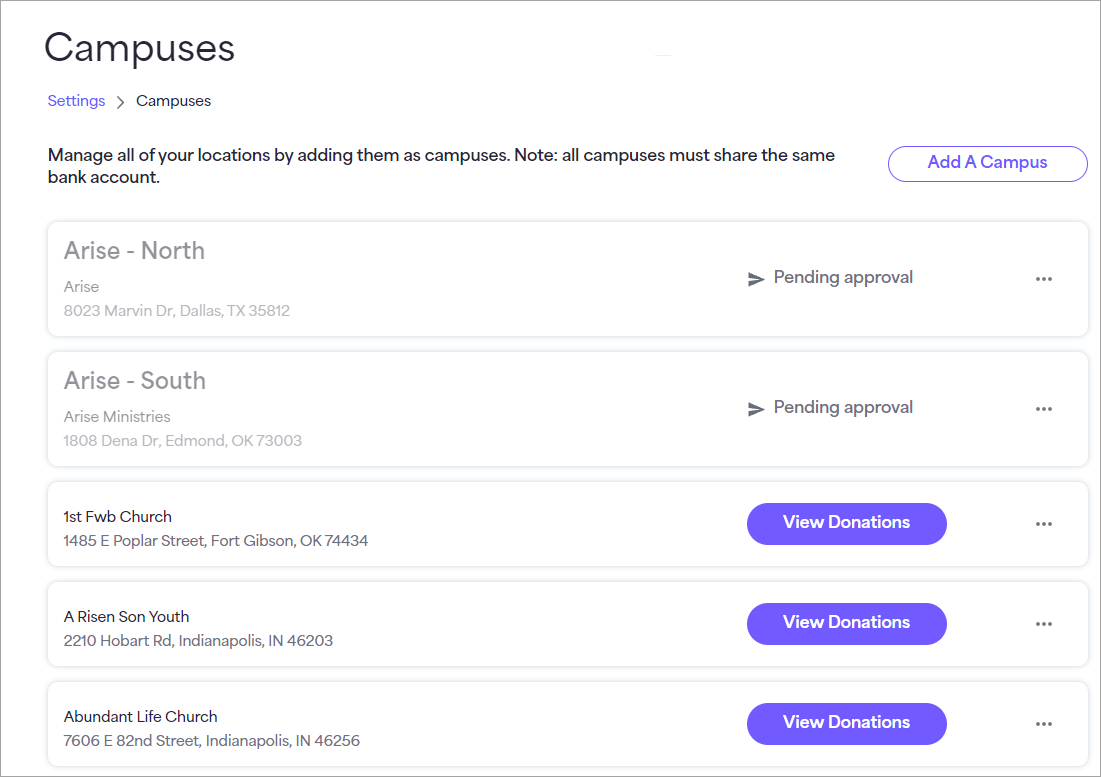
- Select Settings > Campuses. The campuses that have been configured are displayed on the Campuses page. If no campuses are configured yet, you are prompted to add a campus.
Note: The Campuses sub-menu will not be displayed if you are signed in to one of your organization’s campuses instead of the headquarters.
-
- Newly added campuses that have not yet been approved are displayed at the top of the list with a Pending approval label. Once they are approved, the campuses appear in alphabetical order.
- Campuses that have been submitted for deletion and not yet approved, are displayed with a Pending deletion label.
-
- Select Add a Campus to add a campus for your organization.

The Name and the Location is auto-populated with your headquarters name and location and you can change it based on your campus name and location if they are different.
The search results are displayed in the lower portion of the page.-
- If a campus has already been linked to the headquarters, it shows Your campus in the lower right corner of the card.
- If a location has already been registered with Givelify as a headquarters account, it shows Account claimed in the lower right corner of the card. If you need to add an account that is already claimed on Givelify, contact Givelify support.
-
- Select Add campus for the location you want to associate with your account. If you cannot find your campus, select Add manually and follow the instructions in Manually Adding a Campus.
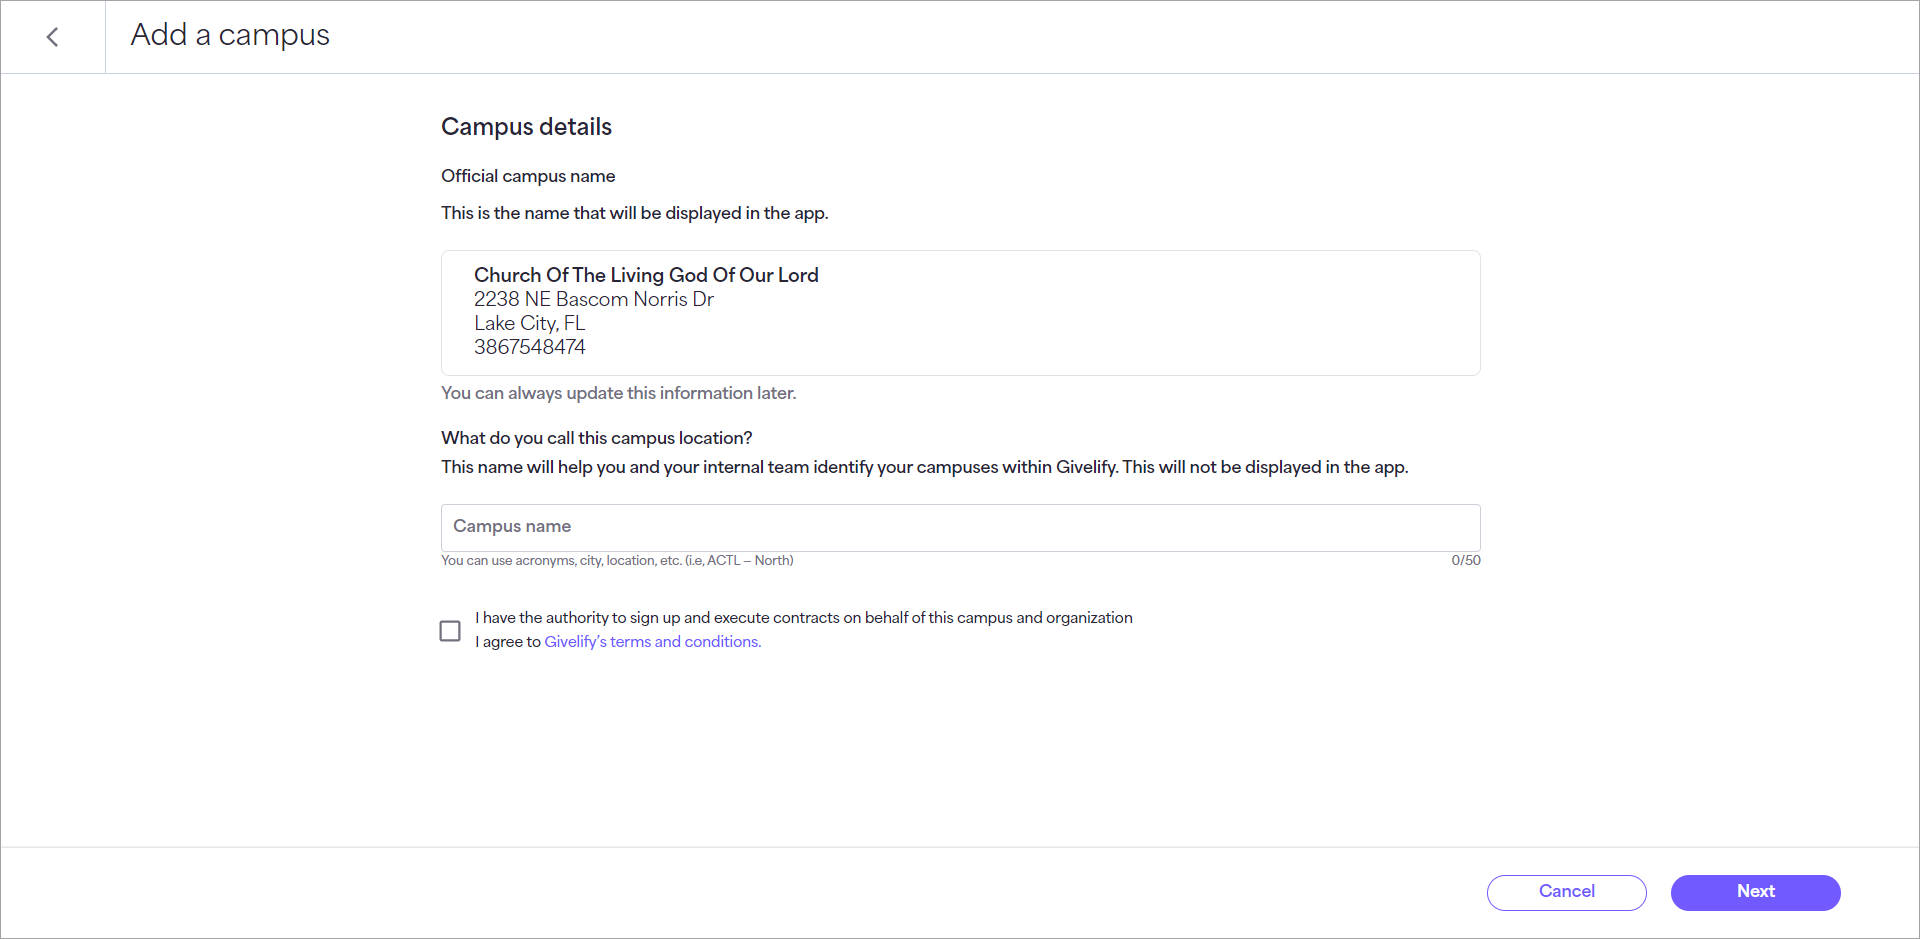
- Enter a Campus name and check the check box to indicate that you have the authority to sign up and execute contracts on behalf of this campus and organization, and that you agree to Givelify's terms and conditions.
- Select Next.
- On the Confirm new campus dialog, select I understand to acknowledge that this location will share the same bank account for donations received across multiple locations. Your campus is submitted for approval.
If you would like to use separate bank accounts, select Cancel and create a new Givelify account for the location.
Once the campus is added, it will appear as Pending Approval until the Givelify team verifies it. During this time, you may receive an email or a phone call from Givelify and you will be notified when the campus is approved within 1-3 business days. - Select Add another campus and repeat the procedure or exit the dialog.
Note: If there is no internal campus name because the campus was set up before the internal campus name was an option, the organization’s full name is displayed. Follow the steps in How to add or update your internal campus name.
Manually Adding a Campus
- Visit analytics.givelify.com and sign in to your organization’s account.
- Select Settings > Campuses.
Note: The Campuses sub-menu will not be displayed if you are signed in to one of your organization’s campuses instead of the headquarters.
The campuses that have been configured are displayed on the Campuses page. Newly added campuses that have not yet been approved are displayed at the top of the list with a Pending Approval label. Once they are approved, the campuses appear in alphabetical order. - Select Add a Campus to add a campus for your organization.
- Select Can’t find your organization or Add manually.
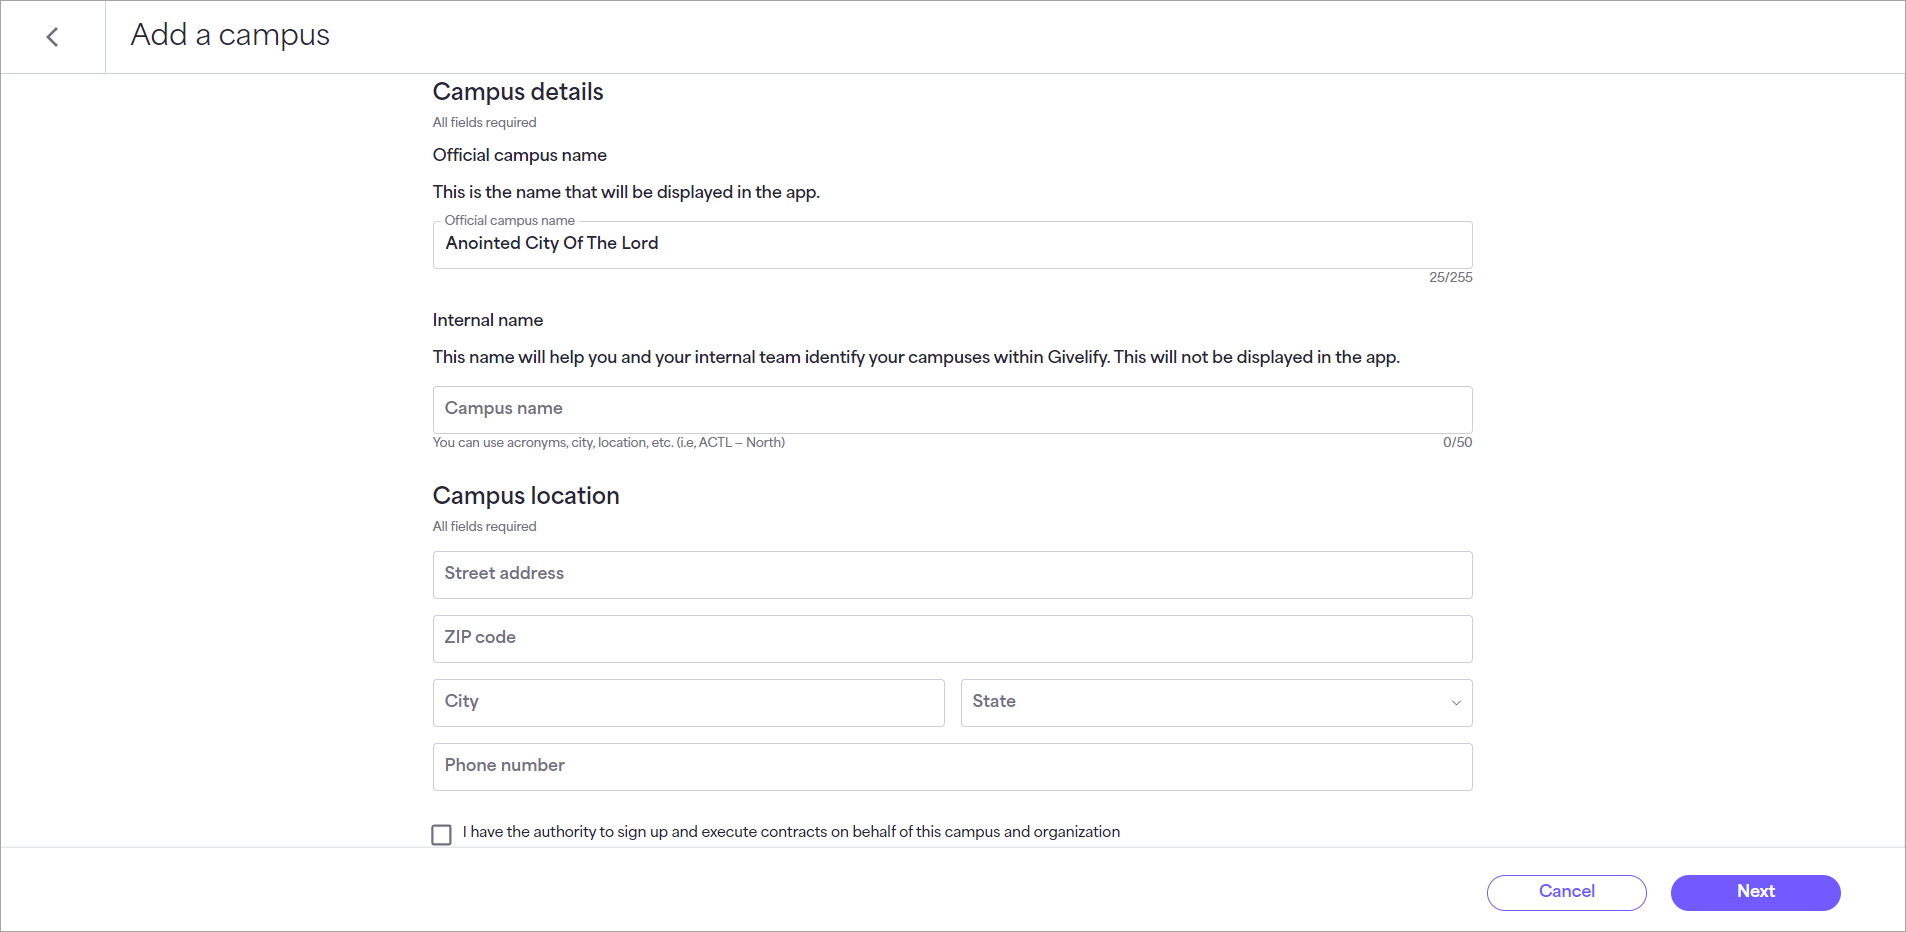
- On the Add a campus page, complete the following information:
- Official campus name – Enter the name that will be displayed in the Givelify app.
- Internal name – Enter a name for the campus that you and your team use to identify your campus internally. It does not appear in the app.
- Campus location – Enter the Street address, Zip code, City, State, and Phone number for the location of the campus.
- Check the check box to indicate that you have the authority to sign up and execute contracts on behalf of this campus and organization, and that you agree to Givelify's terms and conditions.
- Select Next.
- On the Confirm new campus dialog, select I understand to acknowledge that this location will share the same bank account for donations received across multiple locations. Your campus is submitted for approval.
If you would like to use separate bank accounts, select Cancel and create a new Givelify account for the location.
Once the campus is added, it will appear as Pending Approval until the Givelify team verifies it. During this time, you may receive an email or a phone call from Givelify and you will be notified when the campus is approved within 1-3 business days. - Select Add another campus and repeat the procedure or exit the dialog.
Once your campus is approved, you can set up your campus profile, add custom giving envelopes for the campus, and add users.
Related Topics:
- How to edit your campus information
- How to delete or disable a campus
- How to set up your campus profile
- How to invite/add users to your campus
- How to add custom giving envelopes for your campus
- How to add or update your internal campus name
- How to edit your official campus name and address
Feel free to contact our Customer Support team at support@givelify.com if you have any further questions.